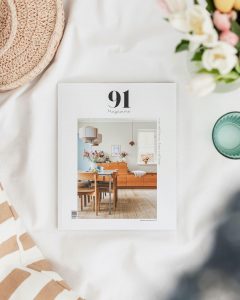
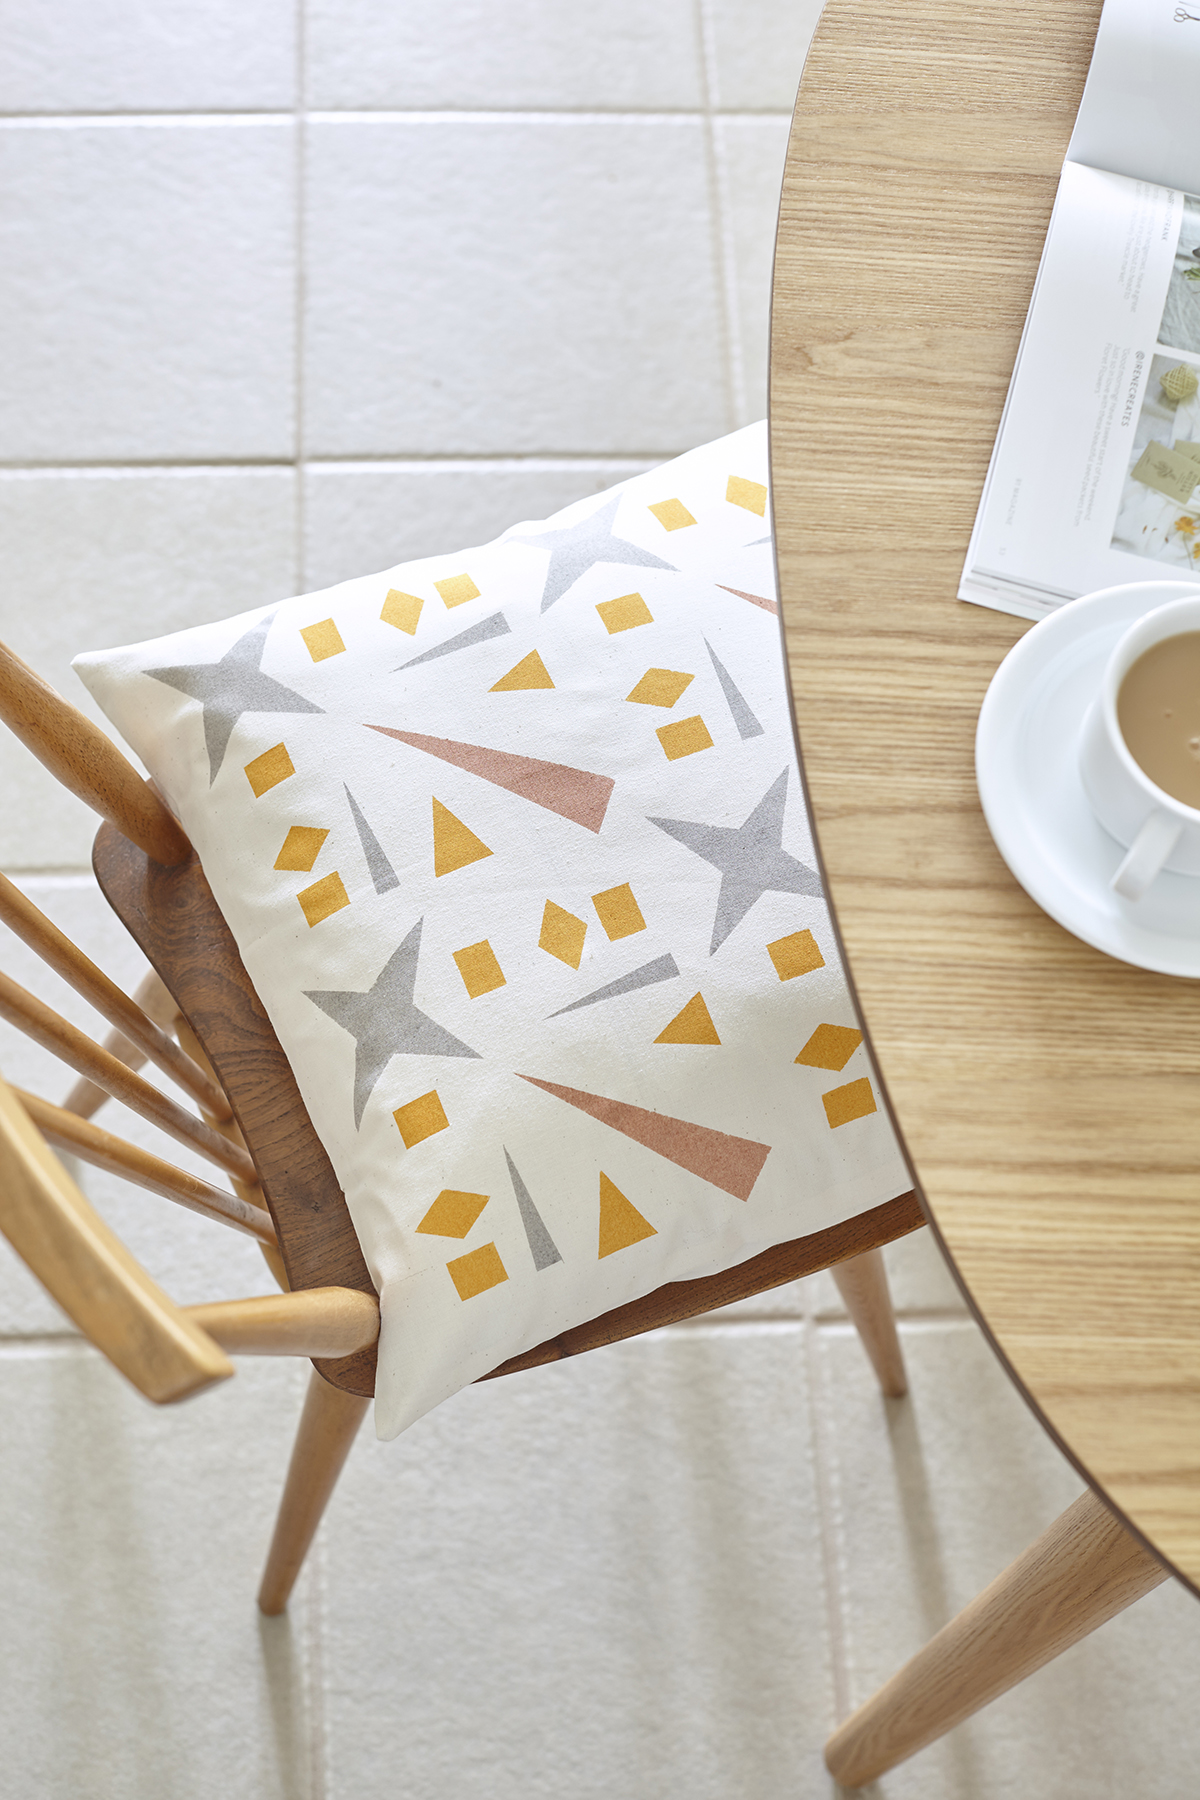
As much as we LOVE to shop here at 91, we also enjoy making our own home accessories once in a while, especially if they turn out as beautifully as this cushion cover designed by Joy Jolliffe (owner of Random Retail). Thankfully Joy isn’t keeping this one to herself, today she shares a tutorial for creating your very own version of this beauty for your sofa or dining chairs. Take it away Joy!
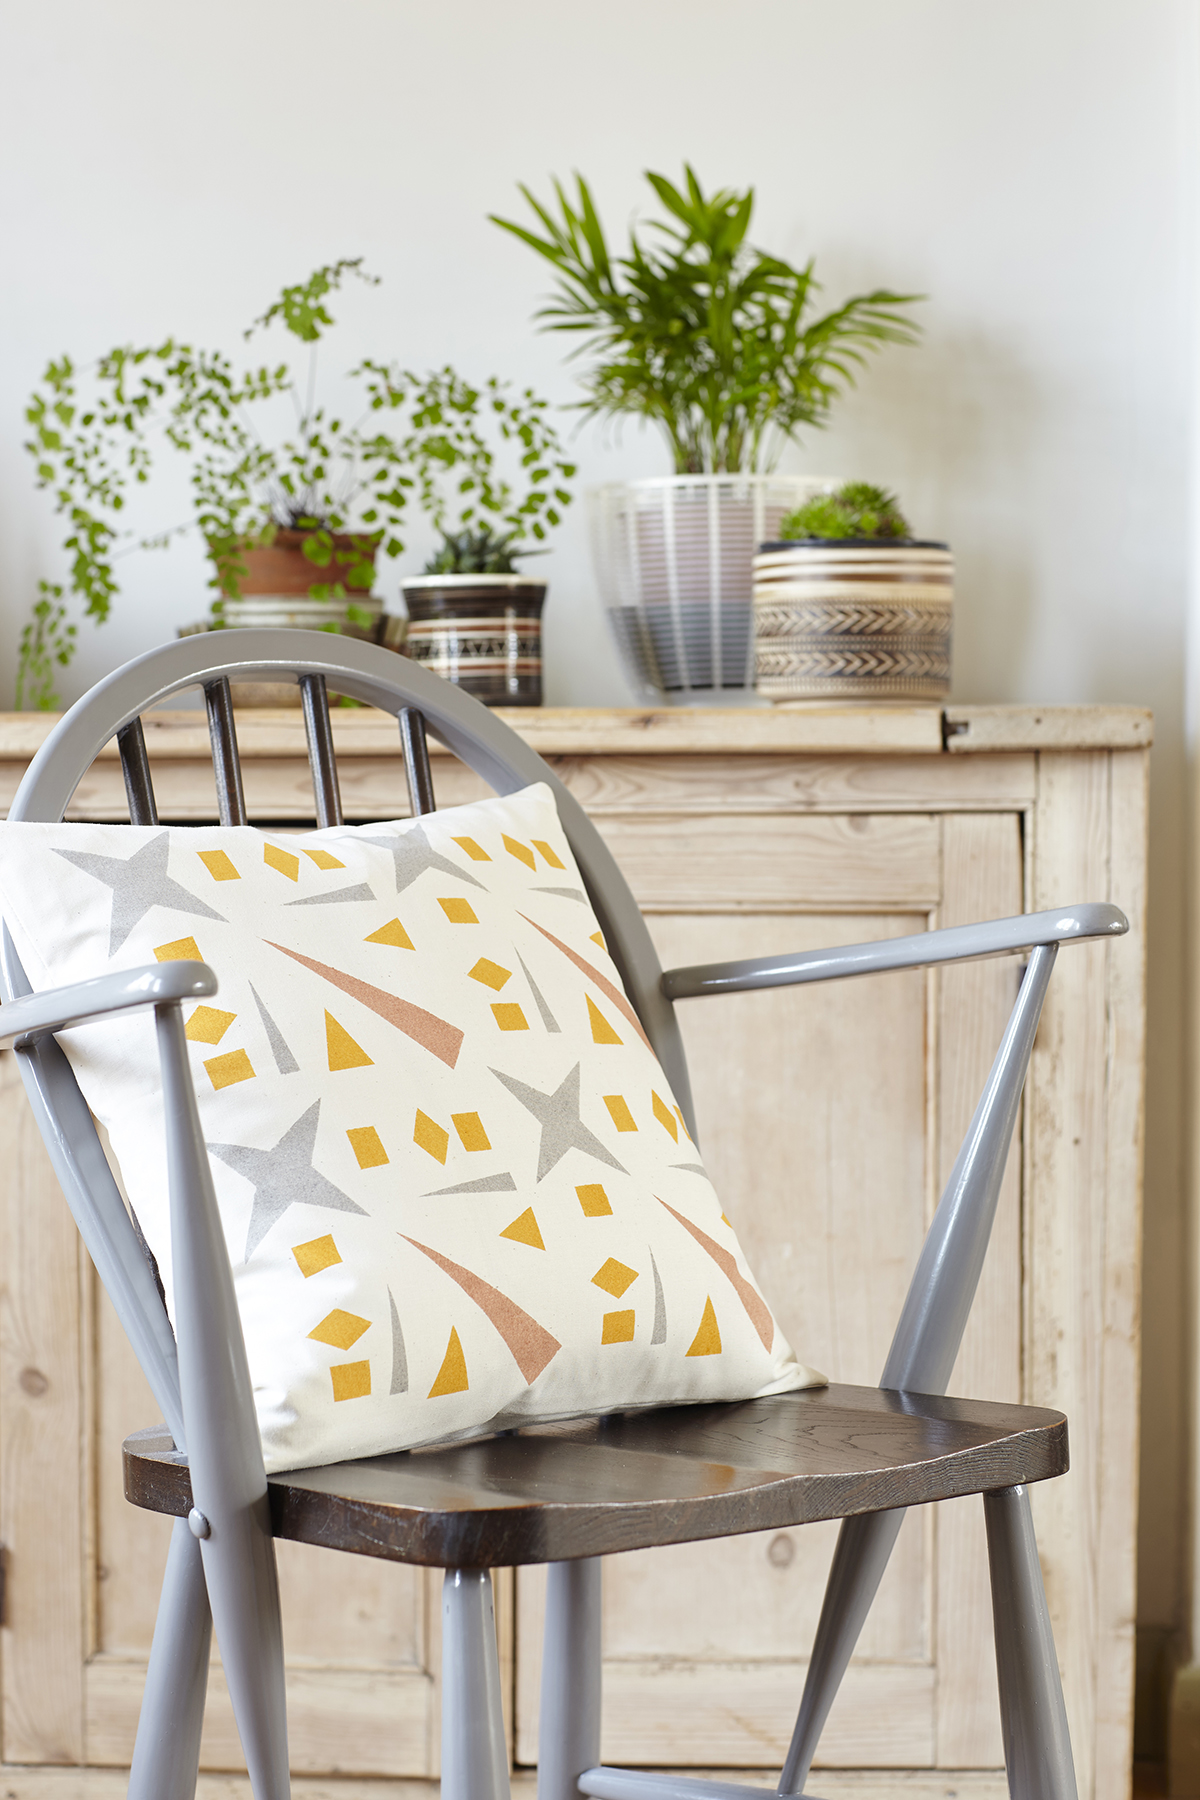
The inspiration for this idea began with torn paper. The snowflake designs that we all made when we were children can be a good starting point for pattern ideas. I also have a small collection of vintage wooden set squares and it was their straight edges and triangular shapes that suggested the idea for a geometric design. Celtic designs and patterned tiles are also great inspiration for this type of look.
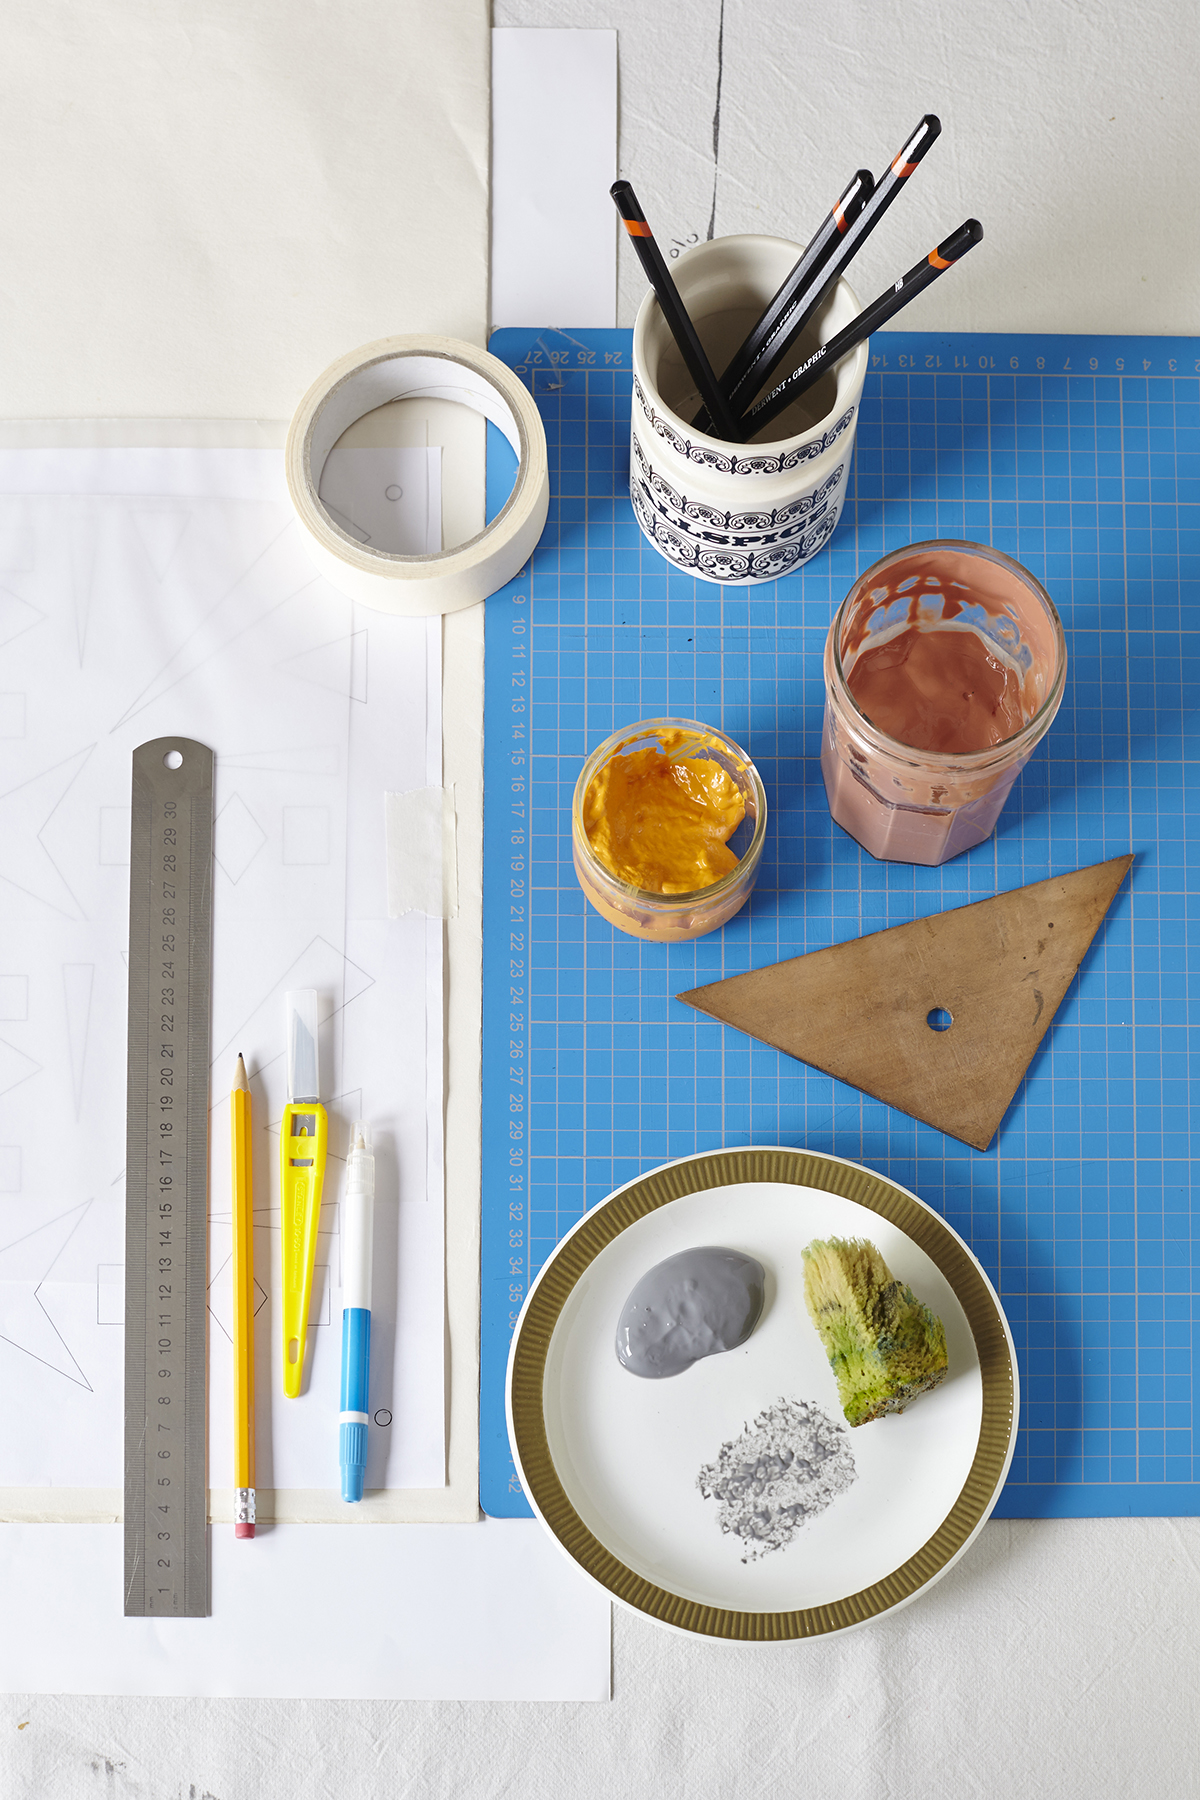
You will need:
- 2 pieces cartridge paper A2 size
- 3 pieces lightweight card A2 size
- Sheet of tracing paper
- Cutting mat
- Metal Ruler
- Scalpel
- Pencil
- Mark and Erase Pen
- Small sponge pieces
- Printing inks
- Masking Tape
- Cushion cover or fabric to make own 40cm x 40cm
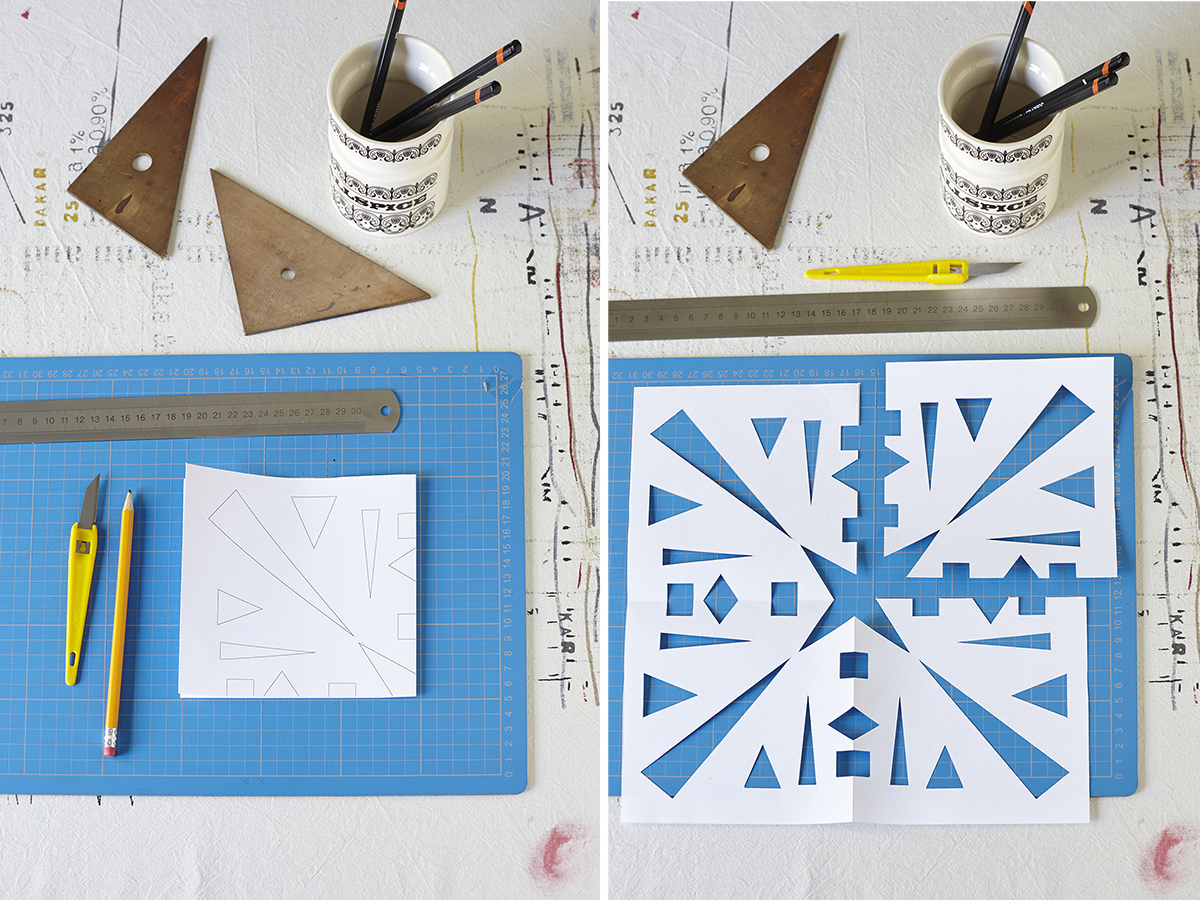
1. Fold a square piece of paper (that measures the same size as your cushion cover) into quarters and draw your geometric design out as above left. Cut out carefully with a scalpel. Unfold the paper.
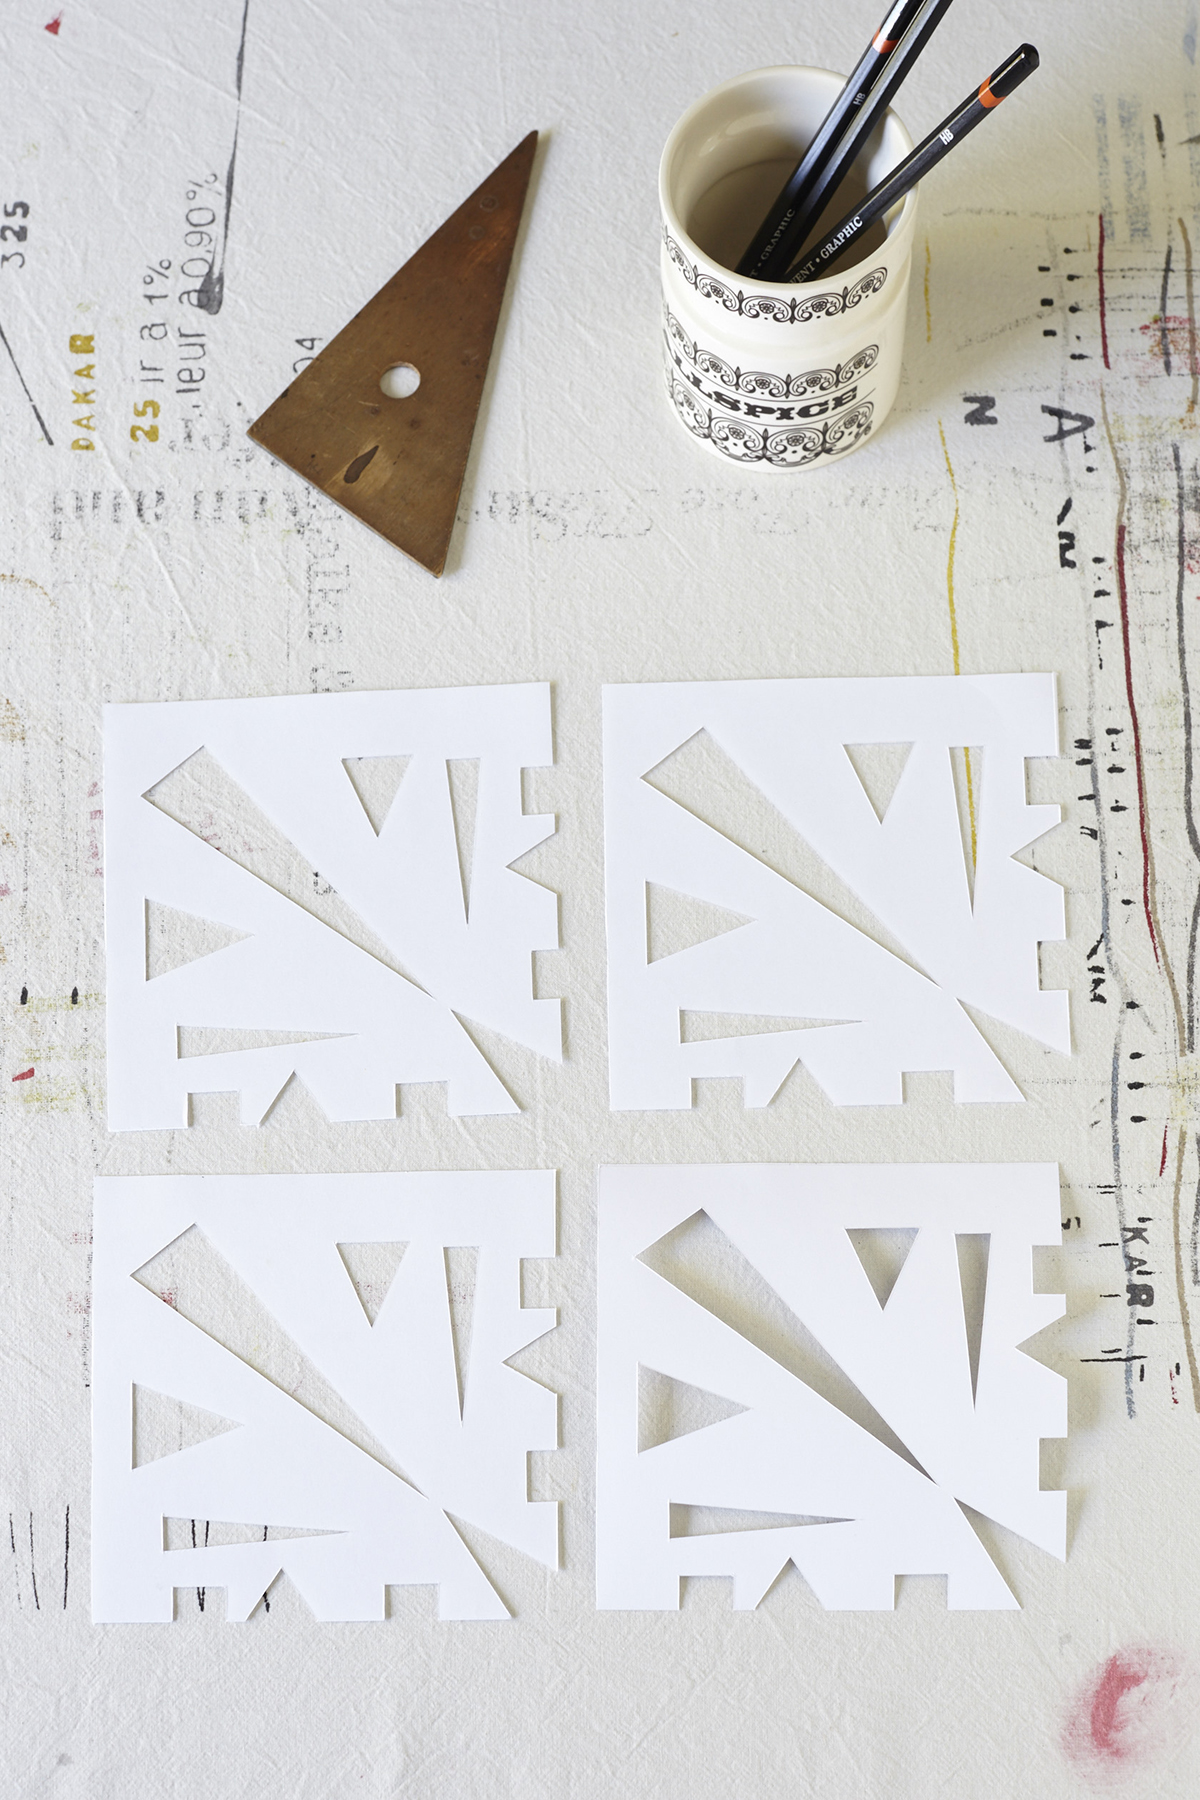
2. Cut the paper into 4 quarters and then reassembled the pieces to make a different pattern. Use the pattern pieces as a guide and draw the shapes onto a large sheet of paper. I mirror imaged the shapes that had been sliced through the middle. I liked the star shape that had originally formed in the middle of the design and decided instead to add one to each quarter making the design more dynamic. (see below)
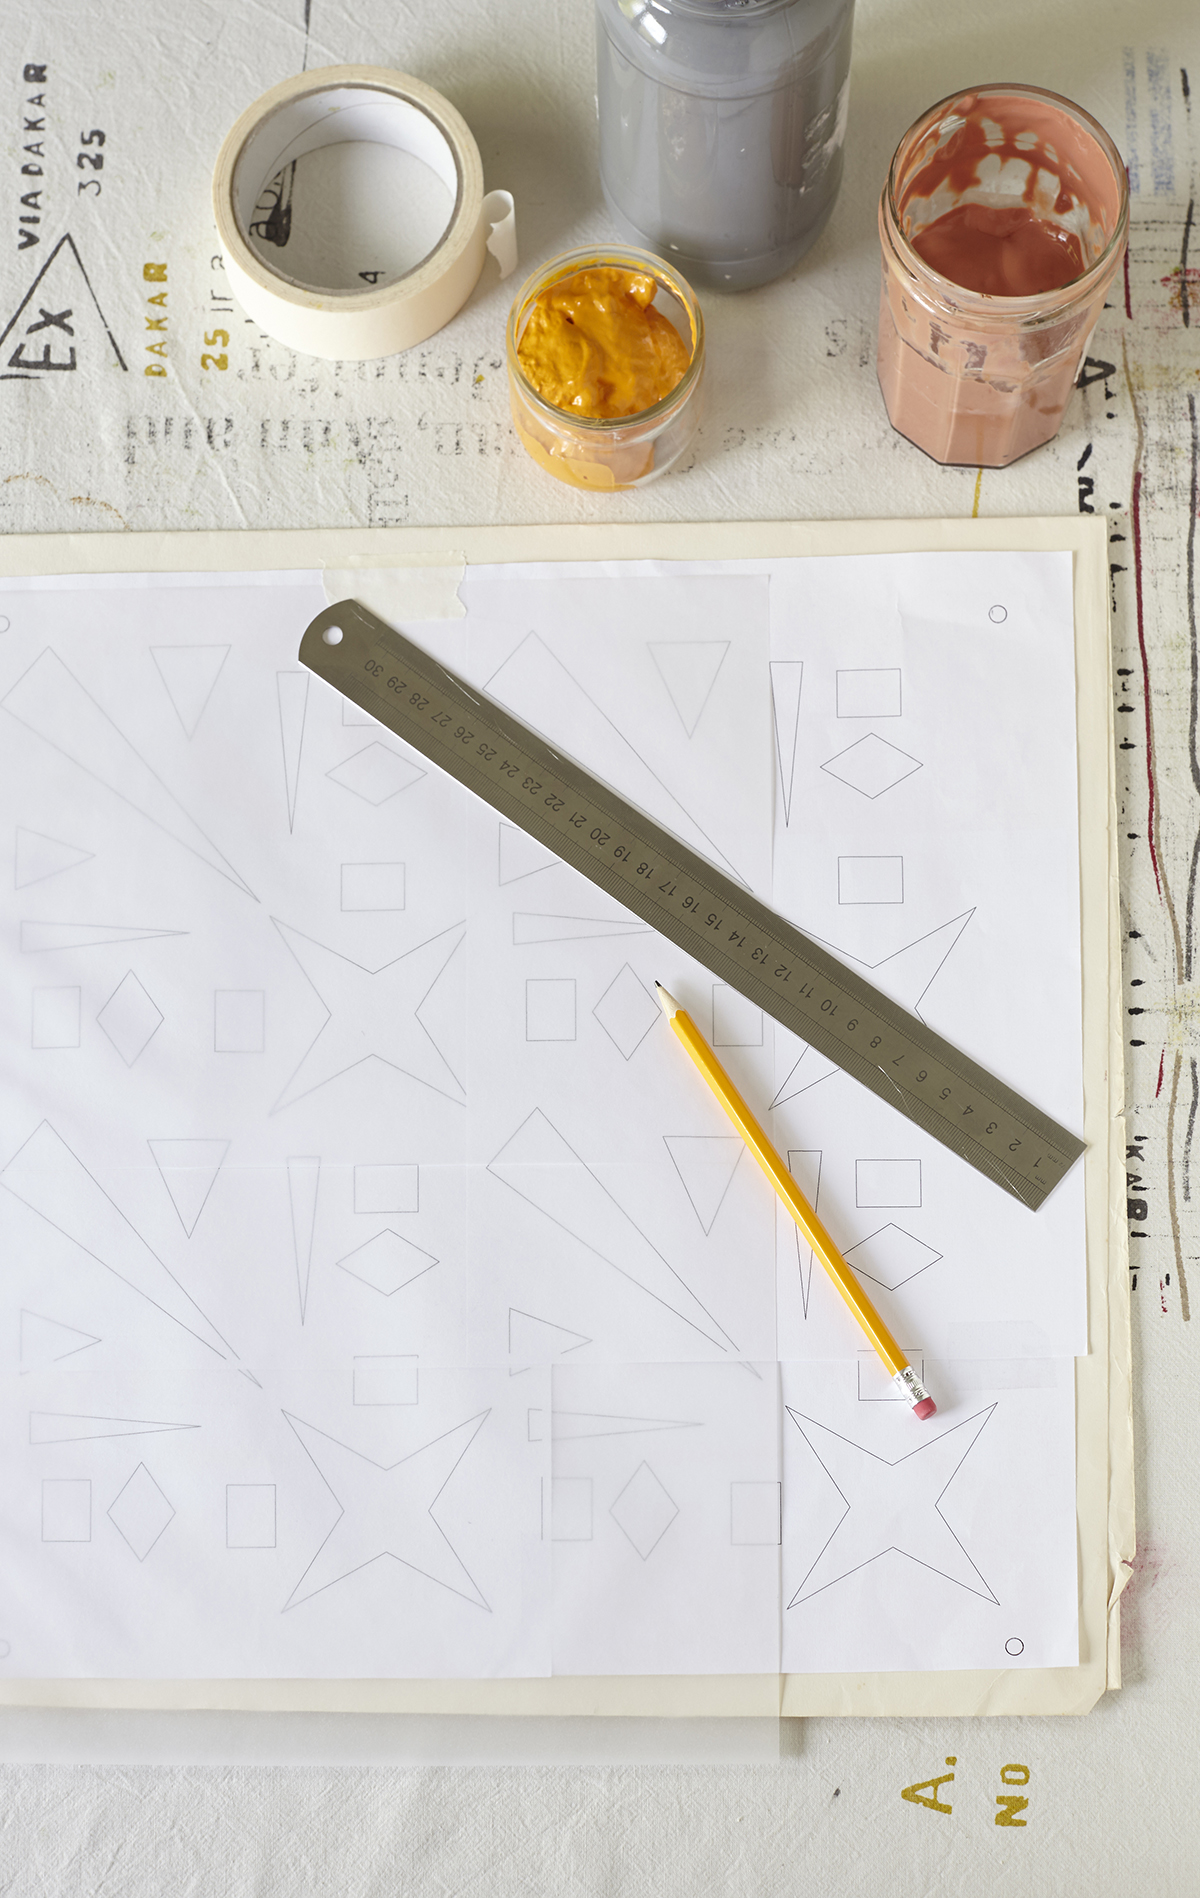
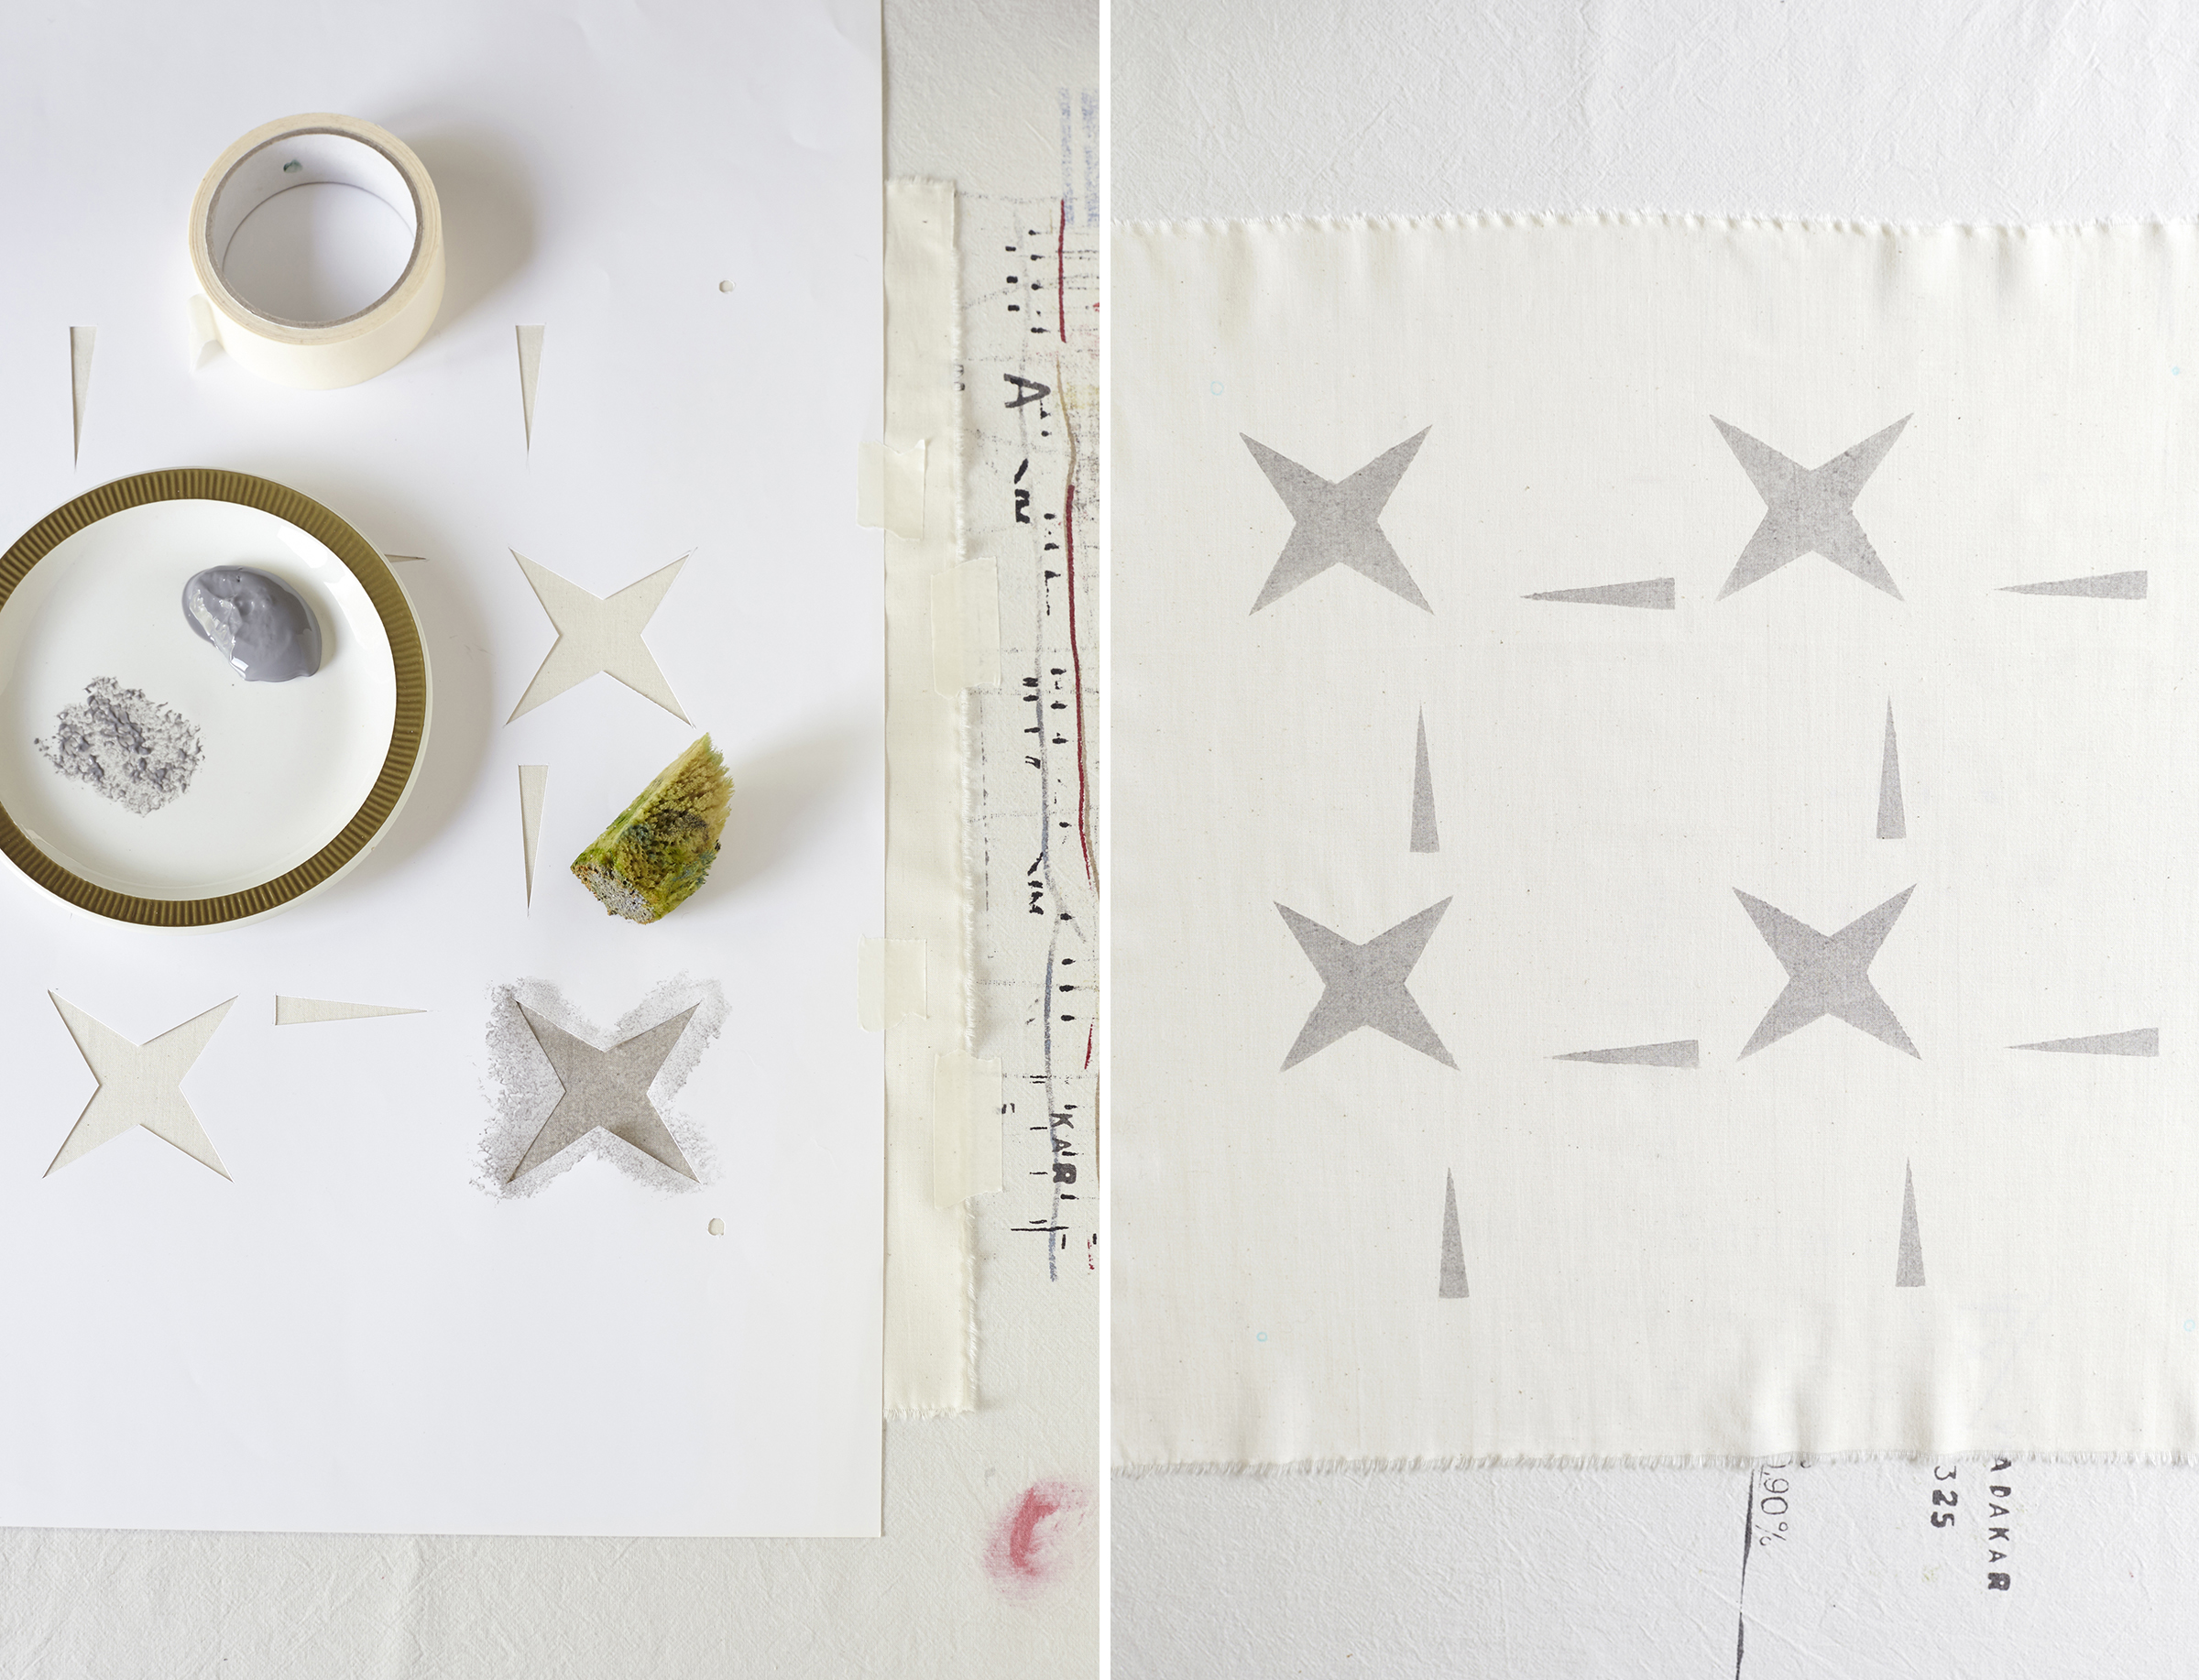
3. Next you need to decide which colours you will use and where. Keep it simple with two or three colours. By reverse tracing transfer each colour group onto three separate pieces of card and cut out each stencil ready for printing. It’s important to cut small matching holes in the corner of each stencil – this gives you registration points to ensure the 2nd and 3rd stencils are positioned correctly.
** SPONGEING TECHNIQUE TIP ** For this design I used a sponge to transfer the ink onto the fabric. It’s a good idea to practice on a spare piece of fabric before starting on your cushion. Dab the sponge onto the ink and then dab off onto a clean part of the plate before applying the inked sponge to the stencil. That way you can build the colour gradually and avoid blobs and blots.
** PRINTING ON READY MADE CUSHION TIPS ** If you are printing onto a ready made cushion cover, arrange your design so that it avoids seams or zips/closures/overlaps. It’s always best to print onto a flat surface. Additionally, if using a ready made cushion cover, place a sheet of paper inside between the front and the back. This ensures ink doesn’t spread to the back during printing.
4. Tape your cushion cover or fabric onto a lightly padded surface. Tape the first stencil into position and using the Mark & Erase pen mark the 4 corner registration dots onto your fabric, then start spongeing on your ink.
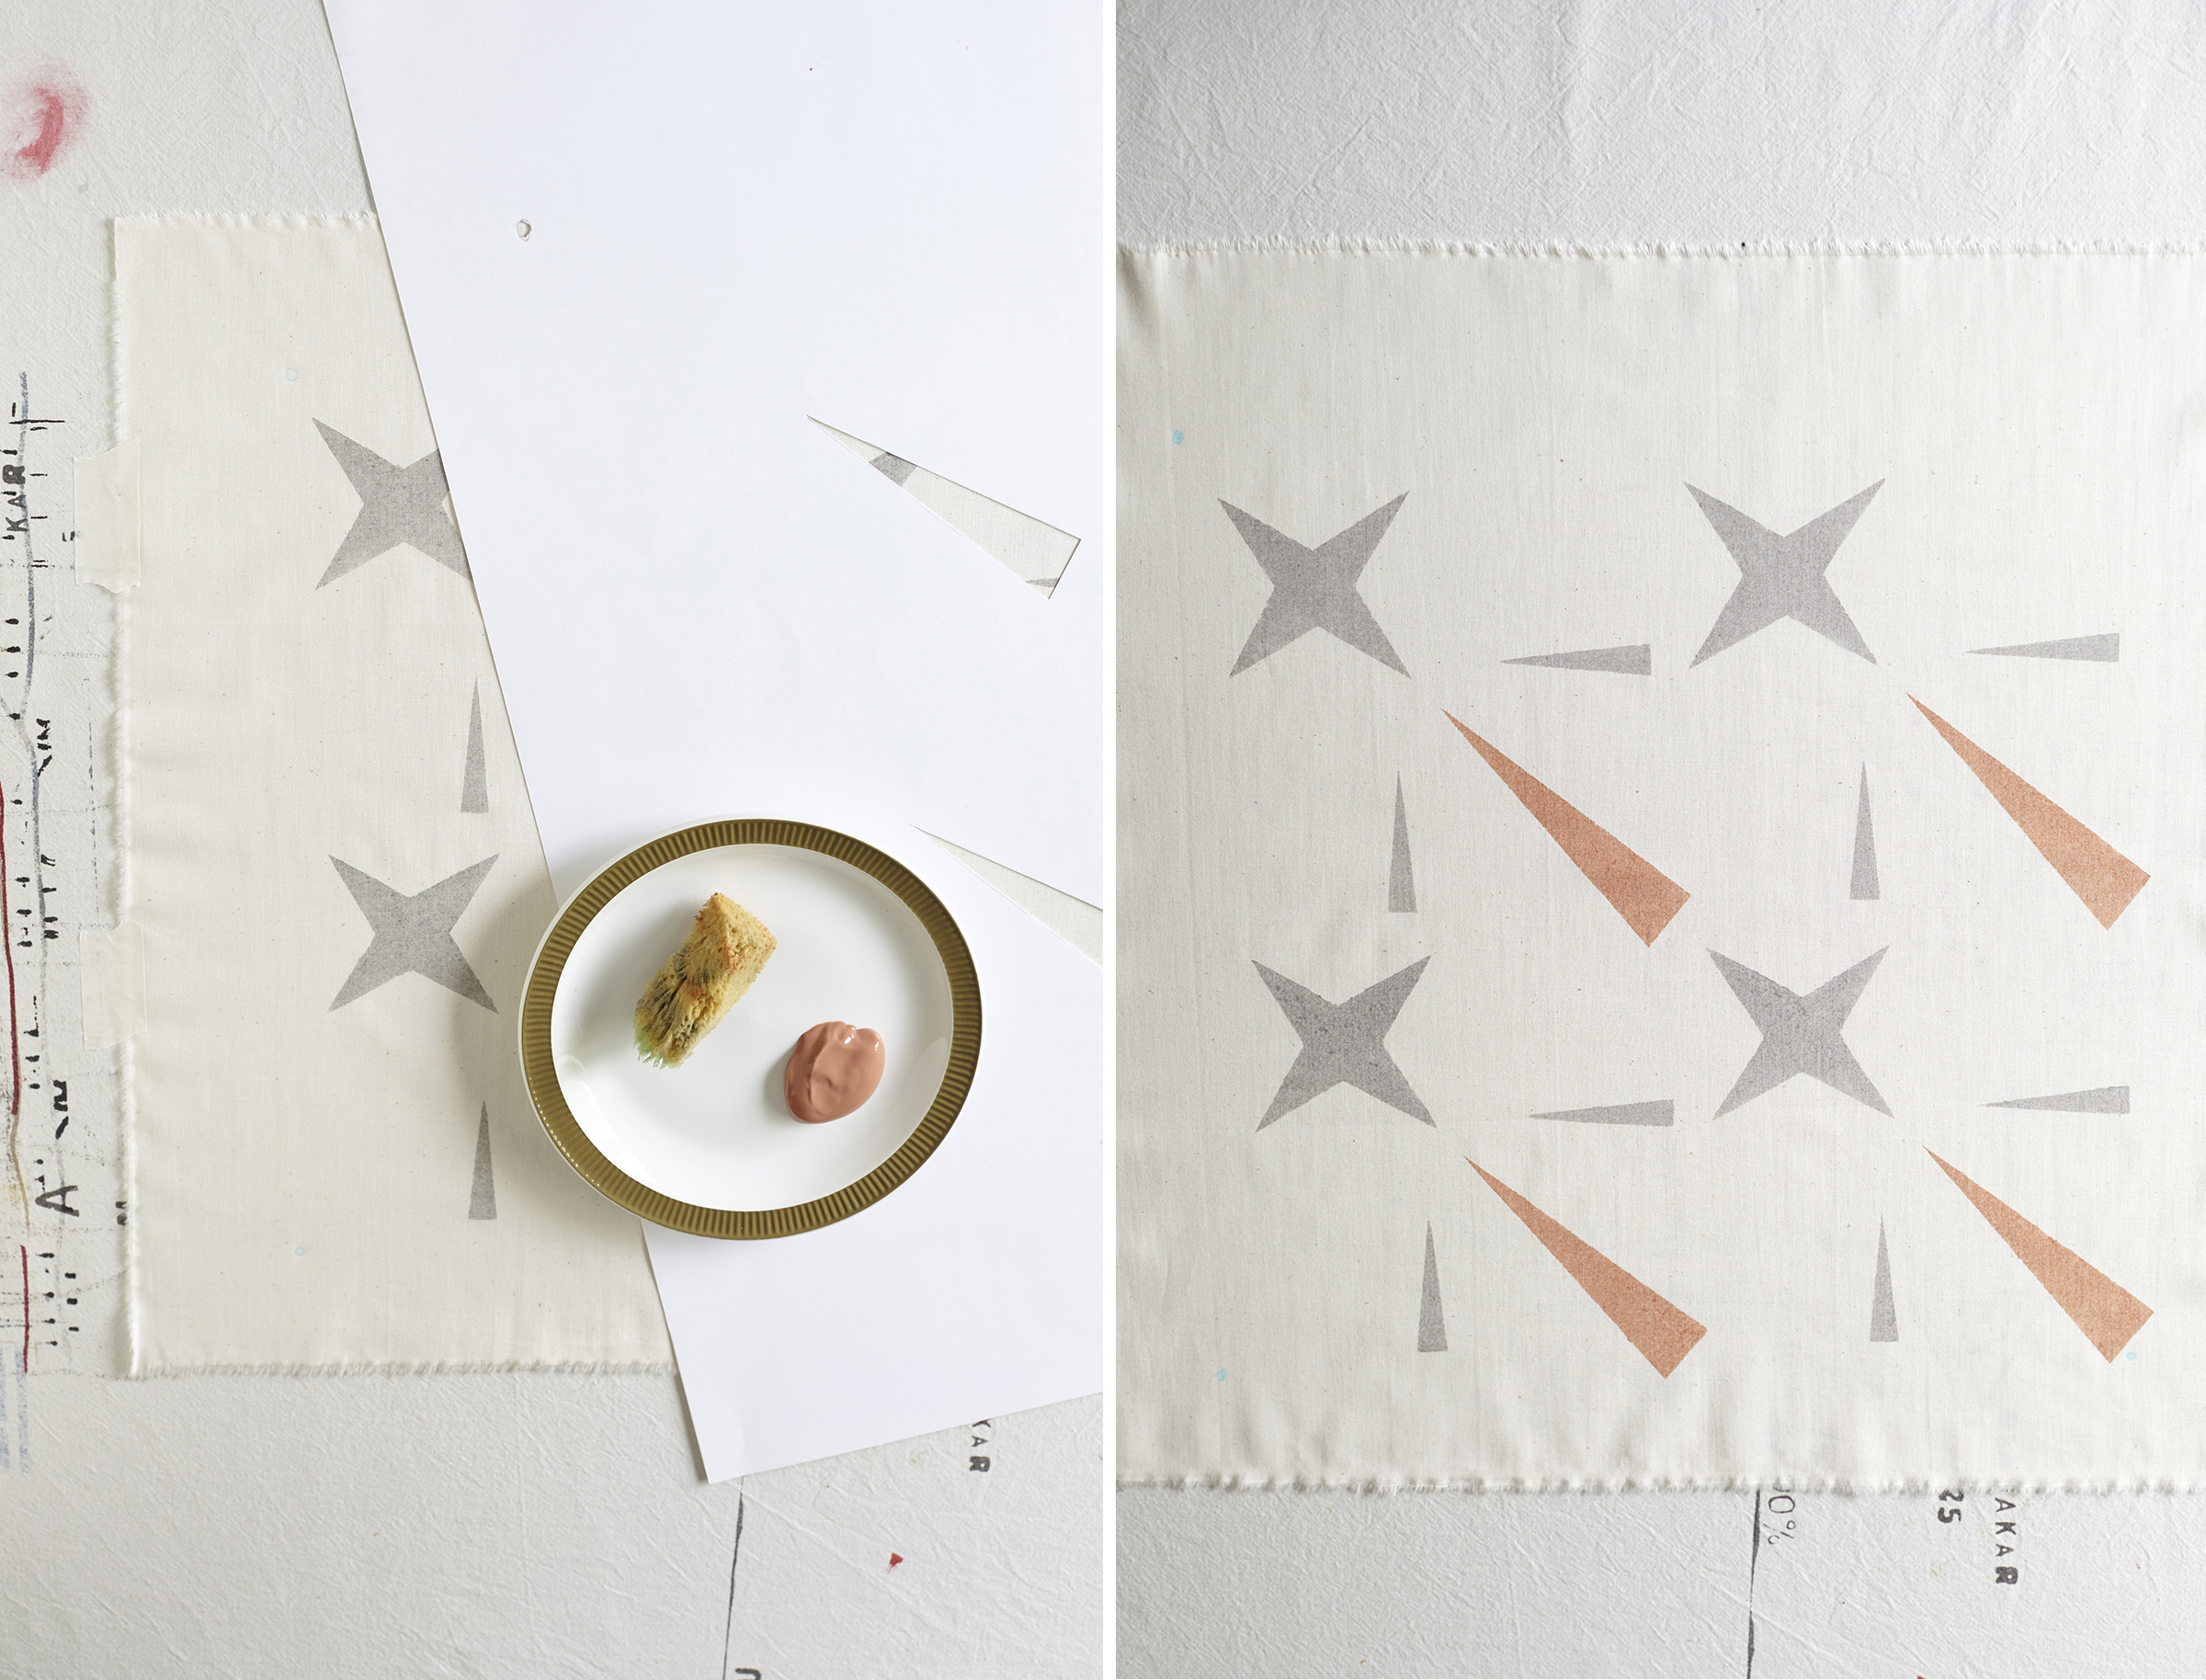
5. When you have stencilled all of the 1st colour, remove the stencil carefully. Leave your fabric to dry, preferably in situ. Using your registration holes and marks, tape the 2nd stencil into place and apply the 2nd colour.
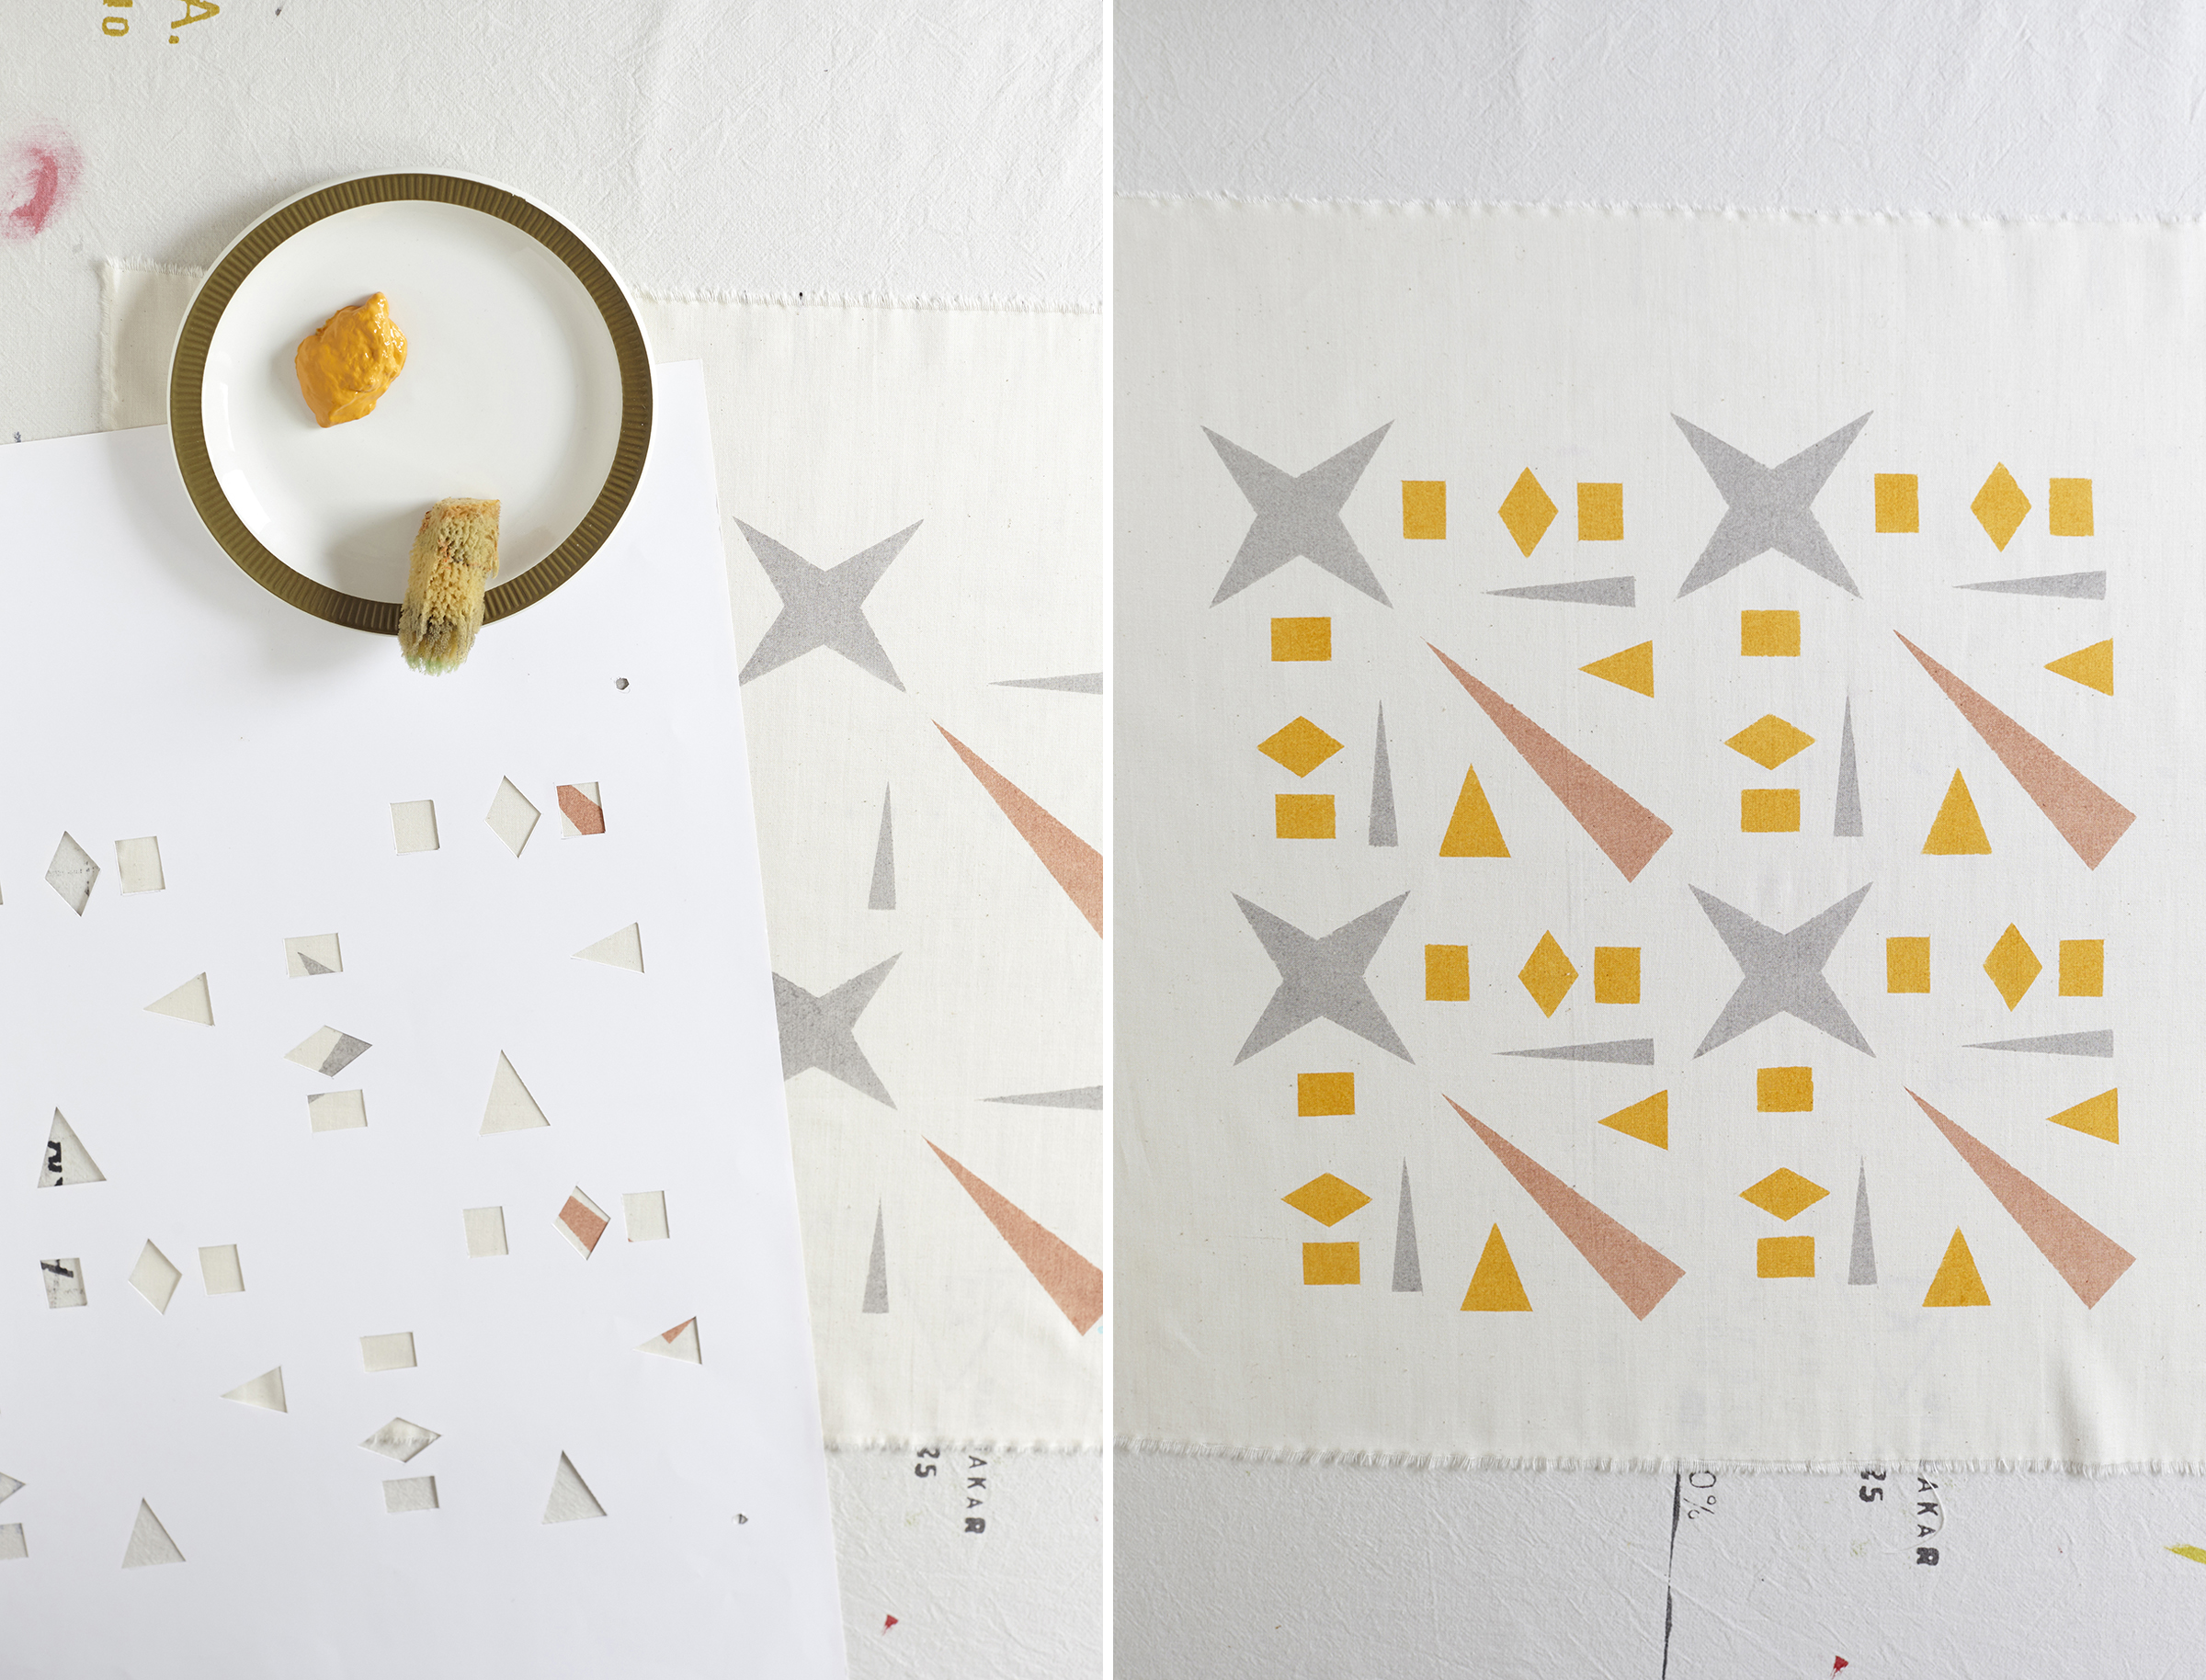
6. Repeat the last step with your 3rd colour to complete the design. Allow to dry, then either stitch your fabric to make up the cushion cover, or simply pop in a cushion pad if you used a ready made cover.
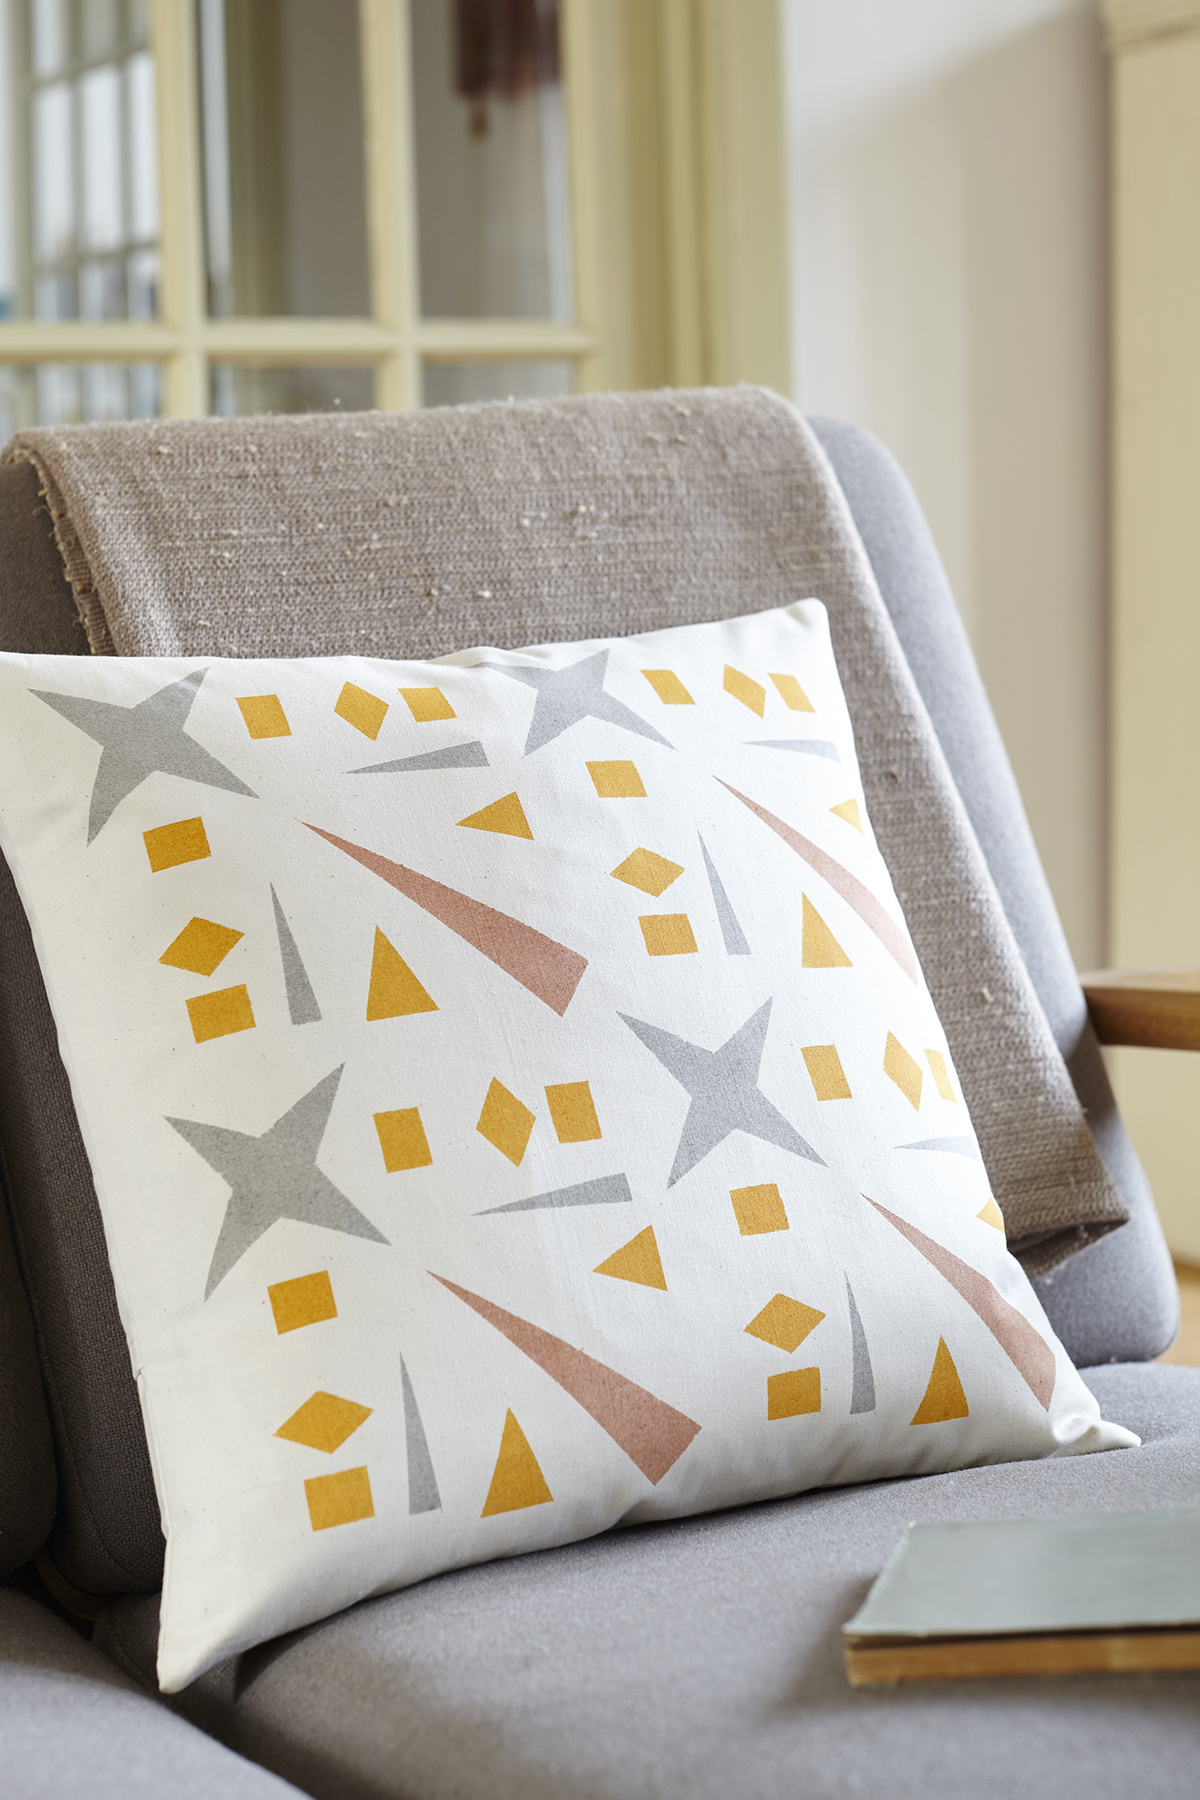
Design and tutorial by Joy Jolliffe of Random Retail. Find more of Joy’s printing designs and techniques in her book Print it!
All photography by Holly Jolliffe